

How To Build A Set Of Wooden Stairs
How to Build Deck Stairs
Calculating the step dimensions, laying out stringers and building a sturdy set up of deck stairs.
Introduction
Certain, building deck stairs can exist tricky. Simply in this story, nosotros'll make it easy by showing you how to estimate footstep dimensions, layout and cut stair stringers, and assemble the stair parts. And you won't need whatsoever hard math to figure information technology out (though your calculations must exist accurate!). These DIY steps will work for replacing an quondam prepare of stairs or edifice new ones. Then grab your tools and permit'south start edifice!
Tools Required
Materials Required
- 2x12 x 12 ft. (three)
- 2x6 x 12 in. (1)
- 3-in. deck screws
- Decking for risers and treads
Project step-by-step (14)
Pace one
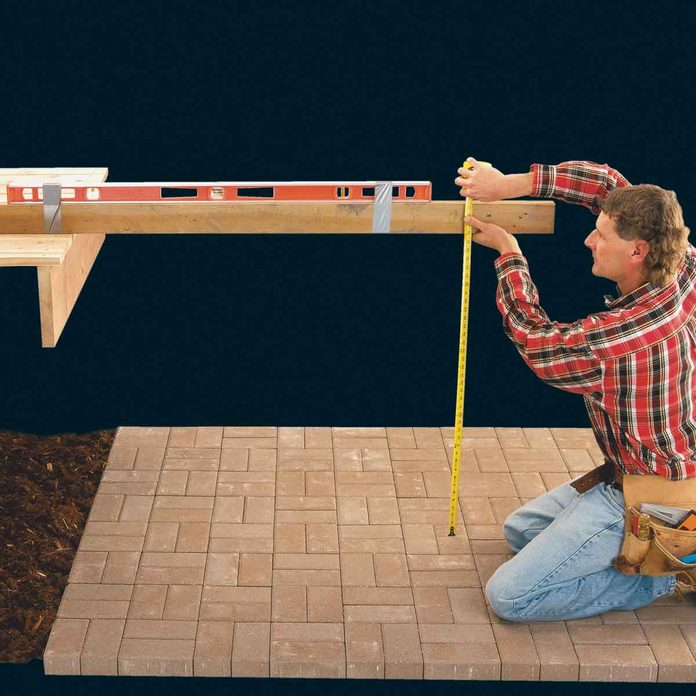
Mensurate the Full Rise to the Deck Landing
- Picture a stair slope in your mind to estimate nearly a forty-degree slope and guess at a landing indicate.
- Rest a straight board on the deck and level over to the landing signal.
- Measure downwards to the ground. That'll exist the estimate hfeight of the stairs, "X."
Pace 2
Find the Number of Risers
- Carve up "X" by seven inches (an approximate step summit) and round off the remainder, up if information technology'due south .5 or more, or downwardly if it'due south less than .5.
- That will give you an approximate number of risers. The actual recommended riser pinnacle is 6-1/2 to 8-in.
- If the riser height is too brusque, re-divide "Ten" past viii and start again
![]()
Step three
Find the Number of Treads
- Simply decrease one from the number of risers.
- There'due south always ane fewer tread than risers, equally you can see in Fig. B.
- Then multiply by x-1/4-in., the platonic tread width for 2 2x6s, to get the full run.
- Measure out that distance from the deck to observe the exact landing point. From this point, you can measure the exact stair height and make up one's mind the stringer and skirt length.
Step 4
Find the Verbal Riser Tiptop
- Measure out the exact full rising.
- Divide the height (X) by your estimated number of risers to find the exact riser superlative.
- The figure volition commonly autumn between 6-1/2 and 8-in., the ideal range.
- If the riser height isn't in this zone, add or subtract a riser and divide again. This volition change the number of treads and shift the landing betoken, so re-measure the verbal tiptop and dissever again.
- Depict a sketch to confirm the plan in your mind and lay out the outset stringer using the exact riser and tread dimensions and your framing foursquare.
Step 5
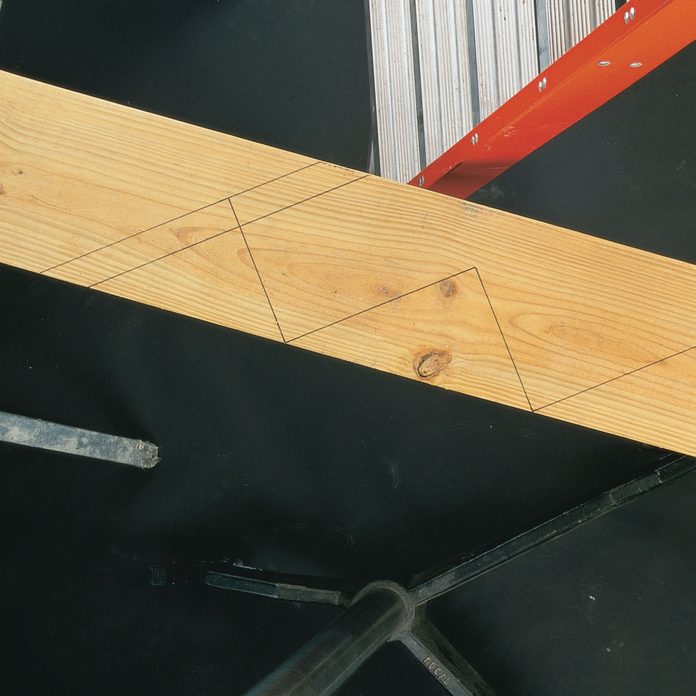
Lay Out the Stairs
- Clamp the stair gauges to the carpenter'southward square.
- Apply the narrow function of the foursquare for clamping the riser gauge and the wider part for the 10-1/iv in. tread.
- Lay out the stairs by drawing on the outside of the square, sliding the square forth until it meets the last mark to learn how to build steps.
- This will create a stair stringer calculator.
- In your layout, note: The tiptop tread is three/iv-in. shorter than the other treads. The bottom riser is 1-1/2-in. shorter than the other risers.

Pace half dozen
Marking the Pinnacle and Bottom of the Stringer to Remove Extra Material
- Mark the top of the stringer to remove three/4-in. of material to permit for the missing height riser.
- Mark the bottom of the stringer to remove the tread thickness.
Pace vii
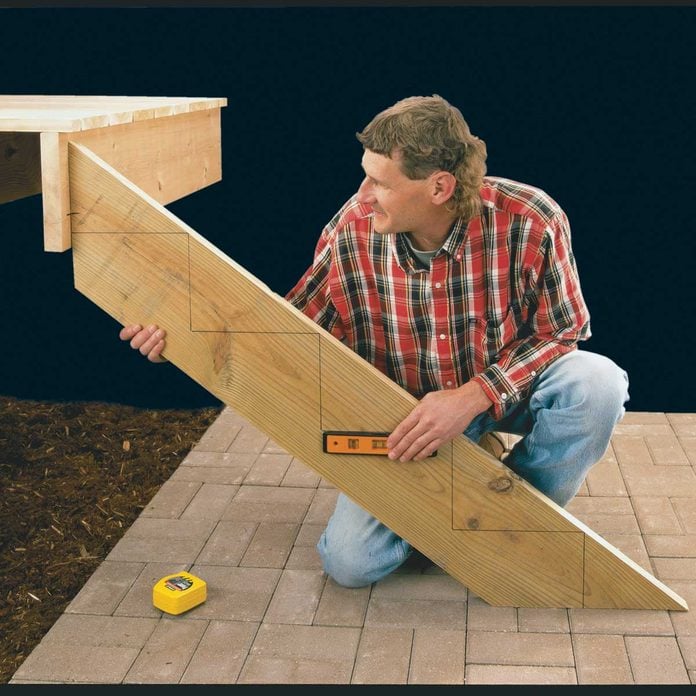
Exam Fit the Stringer to Make Sure Your Stair Rise and Run are On Bespeak
- Cut just the pinnacle and bottom of the stair stringer with a circular saw.
- Exam-fit the stair stringer by placing it against the deck, and check the tread level with a pocket-size level.
- Be sure to test-fit the first stringer before yous cut the others. If you made a mistake, you'll at least be able to relieve the other ii 2x10s.
Step 8
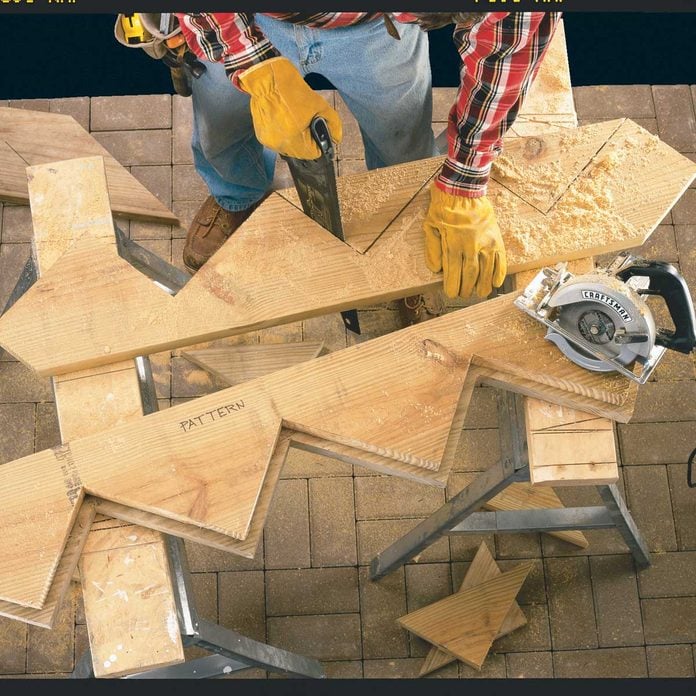
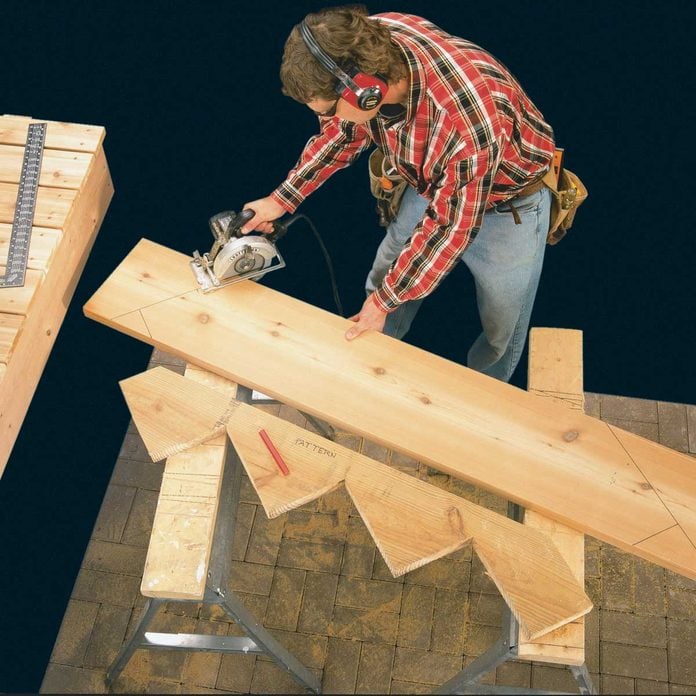
Cutting the Notches Out of the Stringers
- Cut the notches with a circular saw.
- End the cuts when yous reach the corner of the notch and finish the cuts with a handsaw to prevent weakening the stringers.
- Utilise the stair stringer as a pattern to mark and cut the two other notched stringers.
Step 9
Institute a Solid Base at the Landing Point.
- Subsequently yous cutting the stringers, use them as guides to position your landing.
- The base of operations can be a pocket-sized concrete slab, a small-scale deck or fifty-fifty a treated 2x12 leveled in over a 6-in. gravel base.
Step 10
Outline the Design onto the Brim Boards
- Outline the pattern onto one of the brim boards.
- Redraw the top and lesser lines with the carpenter'southward square and gauges at the original settings.
- Cutting the top off so it will be even with the lesser of overhanging deck boards and cut off the cease of the lesser so information technology's about five inches loftier.
- Fasten stringers to the skirts with 3-in. deck screws spaced about every eight inches, alternating from the front and from the back.
- Blast 2x4 supports to both sides of the middle stair stringer flush with the lesser for extra support.
Step 11
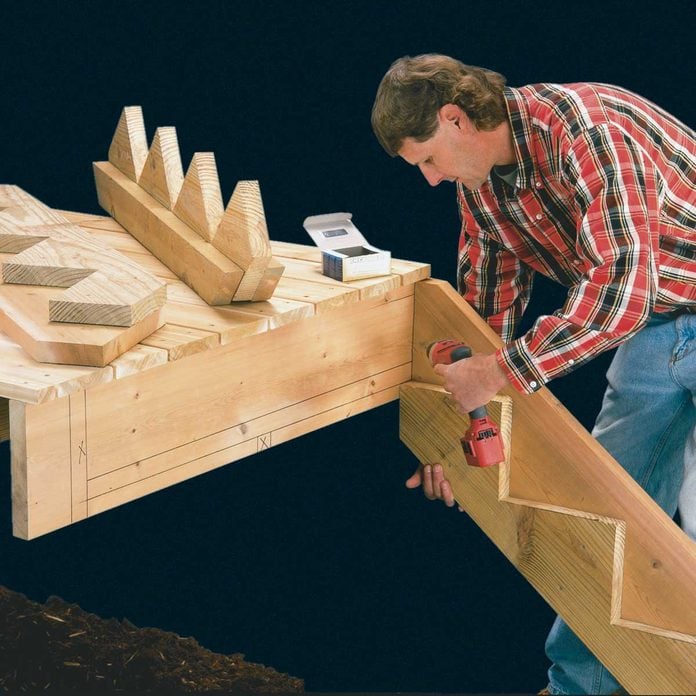
Attach the Brim Boards to the Rim Joist
- When attaching stair stringers, use a level to depict 2 plumb lines to mark the left and right positions for the skirts and horizontal lines to mark the top tread location.
- Tack the skirts to the rim with 3-in. deck screws.
- Then spiral through the dorsum of the deck rim into the skirts with three more than deck screws.
- Center the middle stringer and spiral it into the rim with two deck screws.
Step 12
Attach 2x6 Supports
- Spiral a 2x6 the width of the stringers to the backside of the stringers with ii deck screws into each board.
- Screw two upright treated 2x6s to the behind of the rim and into the horizontal 2x6 with four deck screws into the rim and iv more into the 2x6.

Step thirteen
Bank check the Stair Assembly to Make Sure it's Square
- Nail on the bottom riser with three 8d galvanized nails into each stringer and foursquare the stairs by "cross-taping" the associates and shifting it back and along until the measurements are the same.
- The lesser riser will probably need to be ripped to pinnacle.

Step xiv
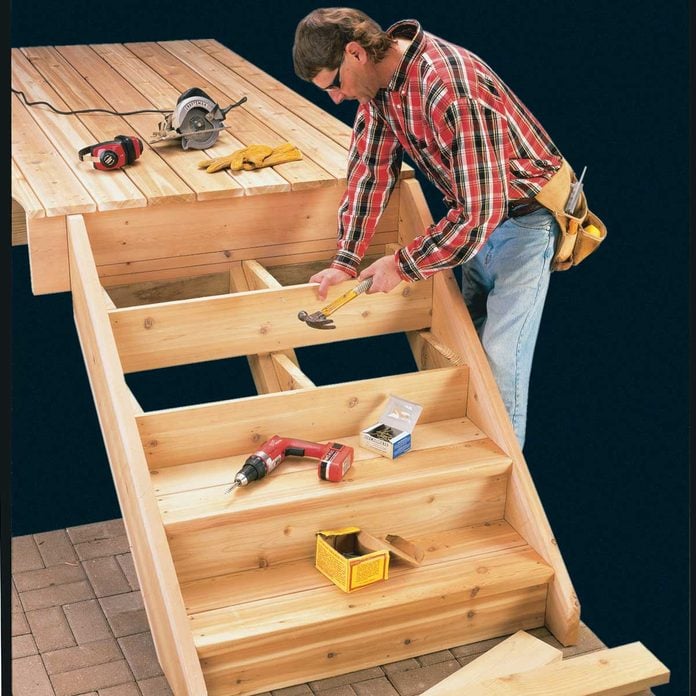
Add the Risers and DIY Stair Treads
- Smash on the second riser board then screw on the ii 2x6 lesser treads, leaving a 1/4-in. gap betwixt the boards.
- Nail on the next riser, and so the side by side tread and then on to piece of work your way to the top of the stairs.
Originally Published: June 11, 2022

How To Build A Set Of Wooden Stairs,
Source: https://www.familyhandyman.com/project/how-to-build-stairs-deck/
Posted by: mitchellnottly52.blogspot.com
0 Response to "How To Build A Set Of Wooden Stairs"
Post a Comment